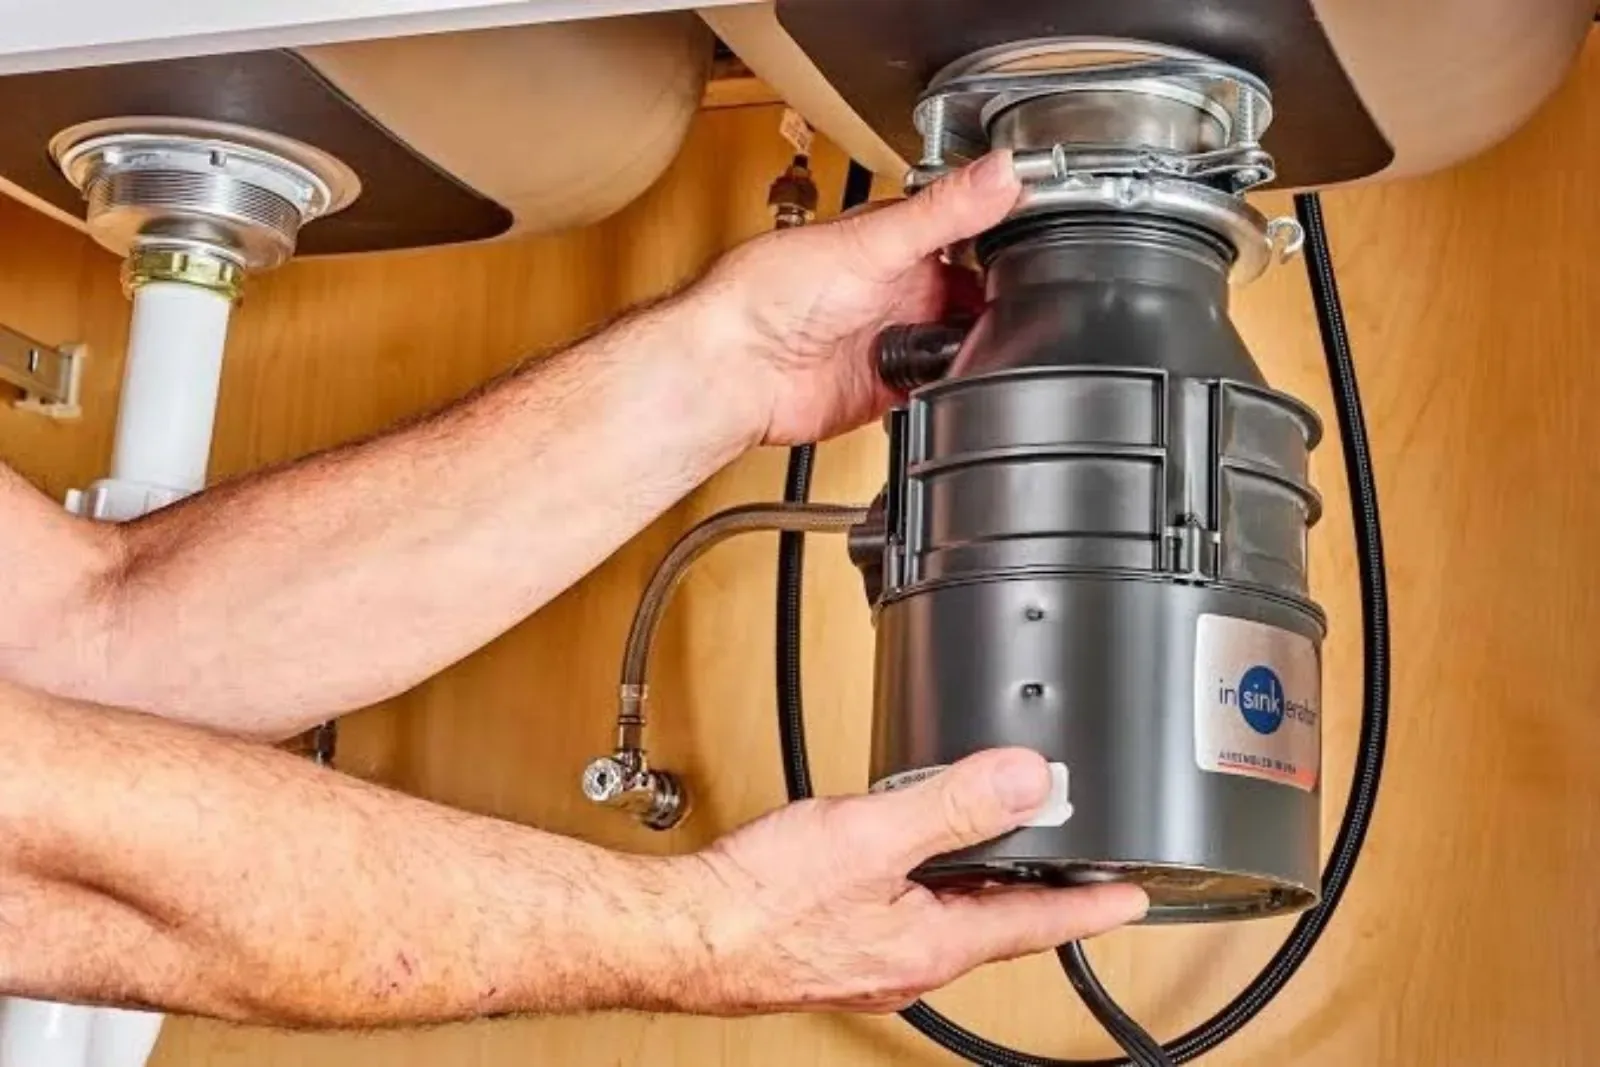
The short version of a single-sink install.
Installing a garbage disposal on a single sink means removing the old strainer basket, bolting a mounting assembly under the sink drain, hanging the grinder from that assembly, connecting a new drain tailpiece to the trap, and giving the unit power. With one bowl there is no second drain to bridge, which is why single sinks are the easy case.
Most of the work is under the sink. The parts that go wrong are the same every time: a poor putty seal at the flange, a tailpiece that does not line up with the trap arm, and a power connection that is wired wrong.
Before you buy: what to check under the sink.
Open the cabinet and look. The disposal body needs a foot or more of clearance below the basin for many models, plus room to reach the trap.
Check for an outlet. Power often comes from a switched outlet under the sink. If you have none, adding one is electrical work for a licensed electrician.
Also look at the trap. The unit's discharge elbow sits higher than a plain basket strainer, so the trap arm may need to be shortened, lowered or replaced.
Gather these before you start.
- A disposal rated for your family's use, with a power cord kit or hardwire option.
- Plumber's putty for the sink flange.
- A new tailpiece or discharge tube sized for the model.
- A dishwasher drain connection, if you have a dishwasher.
- Slip joint washers and a trap adapter that fits.
- A screwdriver, adjustable pliers and a hammer.
- A bucket, rags and a flashlight.
- Wire nuts and a cable clamp if you plan to hardwire.
Step by step: mounting and hanging the unit.
Turn off power at the breaker first, and confirm with a tester if you have one. Place a bucket under the trap, loosen the slip nuts and remove the old trap and strainer. Clean the sink opening of old putty so the new flange seats flat.
From strainer to running disposal.
- 1.
Seat the sink flange.
Roll a rope of plumber's putty, press it under the lip of the new flange, set it in the drain hole and press down hard until putty squeezes out.
- 2.
Add the mounting assembly.
Slip the gasket, backup ring and mounting ring up the flange from below, then seat the snap ring in its groove.
- 3.
Tighten the mounting screws.
Snug each of the three screws in turn so the ring pulls up evenly, then wipe off the putty that squeezed out.
- 4.
Knock out the dishwasher plug.
If a dishwasher will drain into the unit, use a hammer and screwdriver to knock out the plug inside the dishwasher inlet, and fish it out.
- 5.
Hang the grinder.
Lift the unit, line up its lugs with the mounting ring, and rotate until it locks.
- 6.
Connect the discharge.
Attach the discharge elbow with its gasket, then run a tailpiece to the trap arm.
- 7.
Wire and test.
Connect power, close the cabinet, run water and check for drips with a dry paper towel.
The dishwasher knockout nobody forgets, then regrets.
If you are connecting a dishwasher, the disposal has a small plastic plug inside the dishwasher inlet. That plug has to be knocked out before you connect the dishwasher hose, or the dishwasher will not drain into the unit. Skipping this step is the most common reason a new disposal install ends with a dishwasher that overflows into the sink.
With no dishwasher, leave the plug in, or water will spray from the open inlet. Plumbers also loop the dishwasher drain hose high under the counter so sink water cannot run back.
Cord or hardwire: a quick comparison.
Many disposals ship without a power cord and leave you to choose. A cord and plug is the easier route when a switched outlet already exists under the sink. Hardwiring is cleaner and avoids a cord in a wet cabinet, but it is electrical work that has to be done to the wiring rules in your area.
| Option. | What you need. | Trade-off. |
|---|---|---|
| Cord and plug. | A grounded outlet in the cabinet, switched. | Quick, but needs a good outlet and a safe cord path. |
| Hardwire. | Junction box, cable clamp, wire nuts. | Neater, but electrical work and less forgiving of mistakes. |
| Air switch. | A button on the counter, with the outlet below. | No wall switch near water, but adds a part. |
Drain alignment: where installs go sideways.
The disposal's discharge elbow sits at one height. The trap arm in the wall sits at another. A plumber lines them up by cutting the tailpiece to length, adjusting the trap, and swapping fittings until the pipe has a slope away from the disposal and no dips that hold water.
A level, a tubing cutter and a few extra slip joint washers fix most mismatches. If the pipe has to climb to meet the wall, the disposal will back up into the sink. When the fix goes beyond a few trap adjustments, bring in help, since plumbing installation work often includes re-plumbing the trap arm.
Leaks to watch for in the first week.
A new disposal can look fine at first and leak days later. The three usual spots are the sink flange, where putty settles, the mounting ring, where a screw has loosened, and the discharge elbow gasket. Run the unit with a cold water flow, then feel around each joint with a dry finger.
Disposal not fitting or leaking?.
Dispatch can send a licensed plumber to reseat the flange, fix the trap and test it under load.
If water shows at the bottom of the unit, the seal inside the housing has failed and the unit is finished, since there is no way to replace that seal. A leak at the top is a flange or mounting problem that can be repaired. That distinction is exactly what a garbage disposal repair visit sorts out.
When to hire a plumber instead.
Doing this yourself saves labor, but it has limits. Call a plumber if the cabinet has no power, if the old drain is galvanized or cracked, or if the dishwasher tie-in is confusing. A sink that already drains slowly is another flag, since a disposal sends more debris into the line.
A plumber will also size the unit to the household. A half horsepower unit suits light use, and a larger one handles more but needs more cabinet room. Fibrous scraps, grease and coffee grounds still cause trouble in any model.
What affects the price.
The unit itself is only part of the picture. A professional install depends on the model, whether power already exists, the condition of the drain, and whether a dishwasher is involved. A trap that must be rebuilt takes longer than a straight swap, and a new outlet or switch is separate work.
Local note
Claremont drains, grease and the City sewer.
In Claremont the City owns and operates the sanitary sewer, and its sewer page makes the property owner responsible for the private lateral from the house to the City main. The City's system uses a mix of pipe materials, including vitrified clay, PVC, asbestos cement and ABS, and mains run from 8 to 15 inches.
The City advises flushing only toilet paper, with no wipes, paper towels or feminine products, because blockages cost more in older pipes. A disposal does not change that advice, and food scraps and grease from the kitchen line still end up in the same lateral.
If a kitchen drain backs up, the City says to verify with a plumber that the problem is not the lateral before calling it. Community Services can be reached at (909) 399-5431 for a main backup.
Permits and neighbors.
A disposal swap is usually a small job, but the rules for wiring and plumbing changes vary. Ask the Claremont Building Division at (909) 399-5477 if the job needs anything before you start.
The same install steps apply in Montclair and La Verne, but each city has its own building office and utility, so check locally.
Code and electrical note.
Disposal drain connections follow the California Plumbing Code, built on the Uniform Plumbing Code (UPC), and hardwired power has its own electrical rules. If either is unfamiliar, hire a licensed professional.
Questions about single sink disposal installs.
.
Yes, many homeowners do. It needs basic hand tools, plumber's putty, and a safe power source. The risks are a poor putty seal, a mismatched tailpiece, and unsafe wiring. If you are unsure about any of those, or the cabinet has no outlet, hire a plumber to avoid damage.
.
It is a thin plastic disc inside the disposal's dishwasher inlet. If a dishwasher will drain into the unit, knock the plug out with a hammer and screwdriver before attaching the hose. If no dishwasher is connected, leave it in so water does not spray out.
.
Either can work. A cord and plug is easier when a grounded outlet already sits under the sink. Hardwiring avoids a cord in a wet cabinet but requires proper electrical work. Switch off power at the breaker for either one, and ask a licensed pro if you are unsure.
.
This page cannot say, since permit rules depend on the job. Ask the Claremont Building Division at (909) 399-5477 before starting, and say if you plan to add wiring.